Tuesday, November 29, 2011

Footprint Analysis Activity

For this activity, my group was presented with a tub of wet sand. We mixed the sand around to make it light and airy in the middle - which is the best medium for leaving a footprint - and then, one at a time, we left a print. We specified the weather conditions (such as the last time it rained, the humidity, etc...) and then noted the special characteristics of the print (left or right foot, length, width, etc...)


During this test, my group realized that we were all wearing the same brand of shoes, Converse. This brand of shoe is peculiar because, printed at the bottom of the shoe, is a label stating the shoe brand and the shoe size. If found at a crime scene, this piece of evidence could be a huge give-a-way of the criminal's identity.

  1. What was your analysis for each print?
    1. The first print that we analyzed was my shoe print. I was wearing Converse, so you could clearly see "CONVERSE, SIZE 7" printed in the sand. My dimensions were about 12 inches long and 4.5 inches wide. The smaller size indicates a female shoe print.
    2. The second print we analyzed was Darcell's, who was also wearing Converse that day. Her print clearly stated "CONVERSE, SIZE 6" on the bottom, and just like mine, this would be a huge giveaway in a real crime scene. Her dimensions were around mine, also indicating a female shoe print.
    3. The third print we analyzed was Oliver's, who was also wearing Converse, just a different type. His also clearly printed the brand and size on the bottom of his shoe. The only difference was the pattern on the bottom; while me and Darcell's shoe prints were made up of small diamonds, his included a pattern shaped like an eye and a bunch of triangles. The larger dimensions indicated a male foot print.
  2. What were some similarities and differences between the different types of shoe prints?
    1. We all were wearing the same type of shoe that day - Converse - so we couldn't get a really clear reading of this. By looking at other groups' data, however, we saw that people wear boots or flats had a huge difference in prints. Flat prints were very smooth with a few ridges across the width. Boots were separated into two sections - the toe and the heel. Converse (or regular tennis shoes) were all in one piece and had a complex pattern of triangles, squares, and diamonds.
    2. Similarities were that the flats and the Converse were all in one piece, where the boot had been in two. 
  3. What are some similarities and differences between male and female shoes?
    1. Differences included that male shoes have much larger dimensions than female shoe prints. 
    2. Similarities included the pattern on the bottom of the shoe - male and female shoes don't have different patterns (unless the female is wearing high-heels or something like that) so the patterns can be similar or very different, depending on the brand of shoe the person is wearing.

Witness Experiment Activity

For this activity, we had to pretend that we were witnesses in a crime scene. We were instructed to cut out faces from magazines and then further cut the important facial features (eyes, nose, mouth) from each face. After this, we put together a face using the jumbled pieces and let our partner view it for 5 seconds. Our partners then were instructed to reconstruct the face from the jumbled pile.

This activity enabled us to practice the skills required in order to identify a criminal from a quick glance. 


Drug Analysis Activity


For this section of our forensic studies, we analyzed different types of simulated drugs. We tested with two different simulated drugs: cocaine and LSD. We tested by mixing a small amount of the drug with water and then placing a small drop into the Petri dish. We tested the drops with pH paper strips and the LSD and cocaine reagents.

Research Results:

Cocaine:
1. Chemical Name: Benzoylmethylacgoine
 2. Chemical Formula: C17H21NO4
 3. pH: 4.5
 4. Biochemical Tests: This drug is detectable in hair for up to 90 days (or until all hairs on head at time of use are fallen), which makes it very easily detected for three months after you ingest the drug! The drug is also found in the bloodstream and urine for five days after the drug is taken.
  
LSD:
1. Chemical Name:  Lysergic acid diethylamide
2. Chemical Formula: C20H25N3O
3. pH: 4
4. Biochemical Tests: LSD can be found in urine for 24 hours and in the bloodstream for as long as 4 days after the drug is taken. Since LSD is unstable and fragile in heat and light, it must be stored in cool temperatures and dark conditions in order to be detected by drug screening procedures.


Here are the results from our experiment:
DrugpHCocaine ReagentLSD Reagent
1Orange/Yellow   pH6green negativered negative
2Blue pH10blue positivepink negative
3Orange   pH3yellow negativeyellow postitive
4Green/Yellow pH7blue positivered negative
5Yellow pH7green negativered negative
6Orange pH3yellow negativeyellow postitive

Create a Profile Experiment

In this experiment, we were tasked with identifying and organizing the clues presented to us at a pretend crime scene. The clues included a set of four fingerprints, a ripped-up note, a red smear of unknown substance, and two hairs.


#1 - Plain Whorl, #2 - Ulnar Loop, #3 - Ulnar Loop, #4 - Ulnar Loop 

Caucasian hair, possibly color-treated?

Note, reads "You will never find her"

Very dark hair - Asian or color treated?

Red stain - blood, lipstick?

After analyzing the data given to us, we made the following notations:
  • The fingerprints turned out to be two tented arches and two plain whorls.
  • The two hairs were
    • one color-treated caucasian hair
    • one very dark black hair (Asian? African-American?)
  • The note, when put together, read "You will never find her".
  • We were unable to further investigate the red stain, and it is unsure whether it is a bloodstain or lipstick smear. Judging from the shade of red, we are leaning towards lipstick, but without further evidence we cannot make any assumptions.
  1. What do we know? What do we need to further analyze? What do we not know?
    1. We know for sure the types of fingerprints present in Clue #1 - plain whorl and three ulnar loops. Another thing we know is that after you piece it together, the note reads "You will never find her". The last thing we know for sure is that Clue #2 is a color-treated Caucasian hair.
    2. Things we need to further analyze are the hair from Clue #4 and the hair from Clue #2. We could take these to lab to see if there are still any traces of tissue left on the hair, and if not, we could use a comparison microscope to match it up to discover what they are.
    3. Things we do not know much about is the red stain. It could be a lot of things: the most obvious being blood, and others being lipstick or even red juice. 
  2. Create a Profile
    1. Based on the clues presented to us, we think that a woman with color-treated hair was at her home when a man with dark hair (either Asian or color-treated as well) broke into her home, leaving his fingerprints on the door. There was a struggle as the man tried to abduct her, in which the woman was hurt, which left blood somewhere in her home. Hair was pulled from both of their heads as they struggled. After successfully restraining the woman, the man wrote a quick note, reading "You will never find her". 
  3. How could this case be solved?
    1. First and foremost, forensic scientists could try and match the fingerprints using their system. Another way scientists could solve this case would be for them to examine the hairs left behind for tissue, and then try to analyze the possible blood to type it, if it is indeed blood.

Tuesday, November 22, 2011

Lip-Printing Analysis


For this experiment, we practiced with identifying noticable traits on a person's lip-print. Everybody applied an amount of lipstick to their lips and then left a print on a white piece of paper. Once it dried, we wrote down defining features such as high arches, cracks, and scars. The pair of lips above is mine!

After this, we went into the analysis portion of the project. We traded lip prints with other groups and gave them our identifying features, and they were tasked with figuring out which pair of lips belonged to which person. The activity went well, with my group achieving 100% efficiency in the field of identifying lip-prints.

Famous Case Using Handwriting Forgery


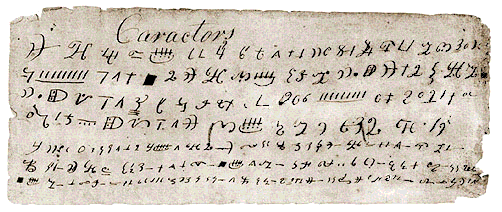
One of the most famous handwriting forgery cases is the Anthon Transcript forgery by Mark Hofmann in 1980. Mark Hofmann meticulously created a forgery of the Anthon Transcript, a valuable Mormon piece of literature. He sold it to the Latter-Day-Saints church in Utah for more than $20,000, upon which it was appraised for $25,000. Upon the investigation of Hofmann's other crimes, including the murder of historian Steven Christensen (1985), it was discovered that the Anthon Transcript sold five years earlier was a fake, along with other documents that Hofmann had forged, including the Joseph Smith III Blessing and the Salamander Letter. 

The (real) Anthon Transcript


Friday, November 18, 2011

Handwriting Analysis Lab - Reflection & Forgery

For last Monday's lab, we practiced forging each other's handwriting. To start, we wrote the sentence "The quick brown fox jumped over the lazy dog" in both cursive and print to give the person who was forging a sample of every letter. Next, our handwriting was analyzed and various traits of our handwriting was written down for further consideration. After that, our handwriting - cursive and print - was free-hand forged by our partner. Free-hand forging means that you forge a signature just by looking at it.

Next, our writing was forged by tracing. This is when your handwriting is physically traced, and this yields the maximum results. Although a traced forge is easier to call out on being a forgery than a good free-hand because of the increased pen pressure, it also looks much more alike to the original than if you free-handed it. It is easier to tell that a free-hand is a forgery, unless the person who forged it is very adept in the art of forgery.

For the next activity, we created fake checks where we used false personas. After we finished these, we were instructed to rip them apart into small pieces. Then we gave them to a different table for them to piece together and then identify whose handwriting it was based upon the different characteristics that were written down by our partners earlier. My group and our partner group successfully identified each other's handwritings.

PICTURES WILL BE ADDED SOON

12 Handwriting Characteristics

In forensic handwriting analysis, there are twelve characteristics to be considered when determining whether or not a signature is forged or not.

Line quality is the thickness, strength, and flow of the letters. Some factors are if the letters are flowing, shaky, or very thick.

Letter spacing is the amount of space put between letters. The letters could all be connected or spaced drastically.
Letter spacing - the letters at top have little or no space between them, while the letters at the bottom have a lot of empty space between them.
Height, width, and size of the Letters is very self-explanatory; this simply analyzes the proportions of the handwriting. Is one letter unusually tall or short?

Pen Lifts and Seperations is the way the person writes. Do they stop before writing a new letter, or do they connect the letters? People usually use the same pen lifts, and so a forgery may stand out if all the letters are seperated when the real signature connects them.

Connecting Strokes is similar to pen lifts and seperations. This analyzes whether or not the capital letters are connected to lowercase letters and if words are connected.
This handwriting has no connecting strokes. Letters are all seperate from one another.

Beginning and Ending Strokes looks at how the writer begins and ends their words. Do they end with a curl, and on an upstroke or a downstroke?

Unusual Letter Formation takes note of any peculiar, unique capital or lowercase letters. Does the writer add any extra curls or loops where the average author would not?

Shading (Pen Pressure) analyzes where the writer presses their writing utensil down the most, either on the upstroke or the downstroke. Where the most pressure is applied is where the script is thickest.

Slant looks at which way the letters tend to slant, either to the left, right, or no slant at all. The most average slant is to the right.
The handwriting at the top has a deep slant to the right, while the bottom handwriting doesn't slant.

Baseline Habits is where the writer tends to write. It could be above the line, below the line, or on the line.

Flourishments and Embellishments are large loops and swirls in handwriting. The most common flourishment is on letters such as lowecase "G", "J", and "F" - anything that involves a loop!

Diacritic Placement is the way the author crosses their t's and dots their j's and i's.

History of Handwriting Analysis

The History of Handwriting Analysis

A text by Camillo Baldi, father of handwriting analysis
  • The first record of the acknowledgement of handwriting was Aristotle in 330 BC when he wrote, "Speech is the expression of ides or thoughts or desires. Handwriting is the visible form of speech. Just as speech can have inflections of emotions, somewhere in handwriting is an expression of the emotions underlying the writer's thoughts, ideas, or desires."
  • The first handwriting analysis was about 100 AD when Roman Historian Suetonius stated that he did not trust Emperor Augustus because he did not seperate his words from eachother.
  • In 1662, Camillo Baldi was credited with the title the "Father of Handwriting Analysis" for stating that he believed handwriting to be a reflection of the author's temperment and personality.
  • Over the next 200 years, handwriting analysis grew but not in the forensic sense. People would have their handwriting analyzed in a similar fashion to taking a personality test!
  • The development of handwriting analysis being used as crucial forensic evidence in the US has only happened within the last 20 years or so.

Monday, November 14, 2011

Famous Case Using Fiber Analysis

One of the most famous cases using Hair or Fiber Analysis was the Atlanta Child Murders case. Victims were found in rivers wrapped in shower curtains, onto which several fibers were stuck. The fibers proved a perfect match to a very unusual carpet in the murderer's home, and after several tests, the criminal was pinpointed solely off of the fiber analysis. The figures had gotten too tiny to leave room for the possibility of anybody else committing the crime.

Reliability of Hair/Fiber Analysis

Although it is on a very rare occasion that forensic investigators find a hair with tissue remaining, hair and fiber analysis is still very useful in cases. When tissue is present, it can be scanned for DNA to find an exact match of the person who shed the hair. In cases where no tissue is present, the hair can be used to massively narrow the list of suspects. Since all types of hair is unique - synthetic hair, Asian hair, Caucasian hair, or Black hair - finding a single strand of hair can narrrow the list by looking to see the structure and color of the hair under a microscope.

How is Hair/Fiber Analysis Useful?

At a crime scene, there is usually up to hundreds of pieces of evidence left behind by the perpetrator. Hairs and fibers are some of the main ones. A collected piece of hair, if tissue still remains, can be tested for DNA and then scanned. This will tell the forensic scientists exactly who committed the crime. Since most hair samples left behind don't contain any tissue, hair can be used to narrow the list of suspects down by just studying the hair's attributes such as color and thickness. The human sheds on average about 100 hairs every day, so the chances are very large that the criminal will leave hair behind.

Fibers can be used to match a certain type of clothing or cloth to something the criminal was wearing. A few scraps of thread from a criminal's torn shirt can help narrow the list of possible suspects down by a lot. The victim's clothing can also be used to analyze fibers found in the perpetrator's car or on their body. Fiber analysis, if analyzing an uncommon type of fiber, can narrow the list of suspects down to nearly one out of one billion!

Ways to Collect Hair and Fiber

At any crime scene, evidence must be preserved to be the most effective in court. There are two techniques for gathering hair and fibers.


The first way of collecting hair or fiber is to first locate it, and then gently apply a piece of tape over it. From there, the tape should be placed in a binder to be reviewed later. If the hair is stuck on anything, such as a fence, the evidence should be left in place.

The most obvious technique for collecting hair and fiber is to pick it up with your bare hand and then placed in a safe location, if the specimen is large enough. Hairs can be put into envelopes (only if the envelope can be sealed) and then marked.

Major Types of Fibers

In addition to hair samples, fibers provide a unique opportunity in finding more evidence for a case. Listed here are a few samples of fibers.
 
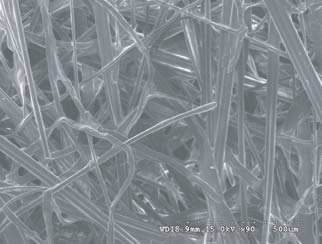
Wool is a fiber sheared from sheep. Notice the ridged pattern on the fibers; this is what makes wool unique under the microscope.
Wool

Polyester is a very strong fiber that, when used in clothing, is very strong and resistent to stretching and shrinking.
Polyester

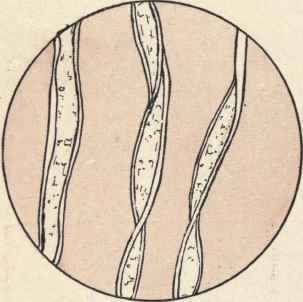
Cotton is an extremely soft fiber that grows from a cotton plant, and is one of the most commonly used fibes in clothing.
Cotton

Linen is a plant fiber cultivated from the stems of flax plants. Like cotton, it is extremely absorbent and is easily dyed.
Linen

Rayon is a man-made fiber, but still not considered synthetic since it is regenerated from cellulosic fiber. It does not reflect body heat, making it ideal for areas with high temperatures.
Rayon

Parts of a Complete Hair

History of Hair and Fiber Analysis

As one of the most recent and upcoming methods in pinning a criminal that forensics has to offer, hair and fiber analysis has helped solve many crimes over the years. Since hair strands are almost as unique as your fingerprints, hairs are another vital clue at any crime scene.

  • In 1899, Francois Goron, a forensic scientist, noticed one key detail of the unknown victim: their dyed hair. This discovery led the scientists to uncover the identity of the victim.
  • In 1910, an unprecedented tome called The Hair of Man and Animals was published by forensic scientists Marcelle Lambert and Victor Balthazard, which includes many microscopic studies of hair from mammals.
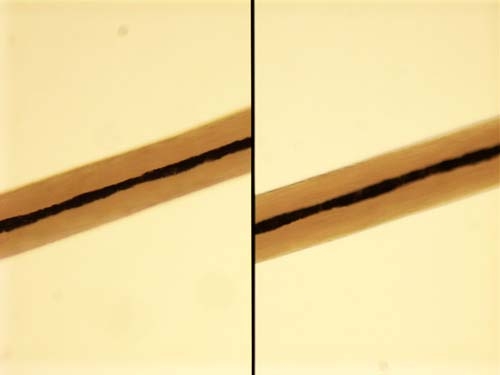
  • Comparison microscopes, which give a side-by-side view of two hairs or fibers, first happened in 1934, spearheaded by Dr. Sydney Smith.
View from a comparison microscope

Lifting Fingerprints

There are several techniques for lifting a fingerprint from a surface. These include fingerprint powders, iodine fuming, and silver nitrate.

Fingerprint Powders

Powders - such as talc or even baking soda - can be dusted lightly onto a fingerprint. If you remove the excess by lightly puffing on the print or tapping at it with a brush, the fingerprint will be revealed and then you can place the print on a piece of tape, which will then be put on a contrasting sheet of paper for viewing.

Iodine Fuming

Also used to show invisible fingerprints is iodine fuming. The print will be placed inside of a small container filled with iodine crystals. When the container is heated, the iodine will convert to vapor and react with traces of the print left behind that will show an easily seen print. The fumes will wear off quickly and the print will fade, so a quick picture is necessary.

Silver Nitrate

When used with fingerprints, silver nitrate reacts with the salt in sweat left behind by the finger, which then transforms into silver chloride. If viewed under ultraviolet light, the print will appear and be a rusty color.

Types of surfaces:
  • Porous
    • Paper, cardboard, unfinished wood - prints are easily preserved because they soak into the material.
  • Hard Surface
    • Asphalt, cement - prints are not easily preserved because the surface is bumpy and prints are often disfigured and distorted
  • Smooth Surface
    • Glass, finished wood, plastic - prints can be easily lifted from smooth surfaces

Fingerprint Patterns

Everybody knows that no two fingerprints are the same, but what makes them so unique? The patterns!


Plain Whorl
A plain whorl is a fingerprint pattern that includes a completely closed off circle. It is similar to the central pocket loop.


Central Pocket Loop
A central pocket loop pattern on a finger is like a plain whorl, but the design isn't symmetrical and completely closed off. They are often tilted to the side.


Double Loop
The double-loop pattern looks like an "S" and is basically two loops facing inwards toward each other.


Radial Loop
The radial loop pattern is a slanted loop that always leans toward the thumb, no matter which hand. On your right hand it will tilt right, and on your left hand it will tilt left.


Ulnar Loop
The ulnar loop pattern is another slanted loop that always is tilted towards the pinky.


Arches
Arches as a fingerprint look like small hills or layers. Similar to tented arches, but rounder and flatter.


Tented Arch
Tented Arches are similar to regular Arches, but are more steep and sharp. Instead of looking like hills, these will look like mountains.

Techniques and Chemicals for Developing Fingerprints


For forensic scientists, one of the most important parts of any investigations is finding fingerprints. Fingerprints are key parts in finding criminals, so it is vital that any invisible fingerprints are found!

Optical techniques such as ultraviolet light are the first step in detecting invisible fingerprints. Ultraviolet light can be used to find prints on any type of surface, but for some certain surfaces more techniques are needed. On a porous surface, no latent fingerprints might be found if the surface was wet when the print was left. If it was a dry porous surface, then metal salt or ninhydrin can be used to lift fingerprints. If you find a fingerprint on a dry, nonabsorbent surface, then you must sprinkle powder (white powder on dark surfaces, dark powder on light surfaces) and then lightly brush away excess powder to reveal the print. The print can be lifted using tape.


Fingerprint on tape

Types of Fingerprints

There are three types of fingerprints - direct, latent, and plastic!

Direct Prints - A person leaves a direct print when they have something on their hands, like blood or paint, and touches something. The fingerprint is transfered to the material and sticks their through the liquid.

Plastic Prints - A plastic print occurs when you press your finger into a substance such as clay or paint and you leave your print behind. This is the type of print that the ancient cultures of Bayblon and China utilized instead of signatures.

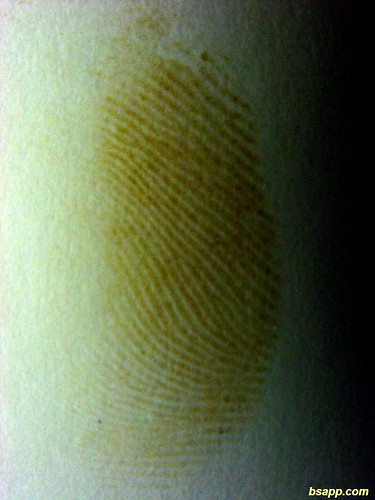
Latent Prints - Latent prints are the most common type of prints. Whenever you touch something - it could be anything - you leave behind your fingerprint because of the oil on your skin. Although most of these prints are invisible to the naked eye, they are always there!

Direct Fingerprint - left behind because of paint on somebody's hand

History of Fingerprinting

Fingerprinting has been a valuable resource throughout the ages, starting back in the age of Babylon!


  • Babylonians used to press their fingerprints into clay in place of a signature
  • In 14th century Persia, it was discovered that no two fingerprints are the same!
  • In 1686, Marcello Malphigi observed the unique ridges, loops, and swirls on fingerprints.
    • A layer of skin is named the "Malphigi" after Marcello Malphigi!
  • Fingerprinting to solve crimes began in the 1900's
  • In Mark Twain's 1883 book "Life on the Mississippi", a criminal was identified using fingerprinting methods.
Life on the Mississippi

  • In 1892, the book "Fingerprints" bySir Francis Galton was published
  • 
    Sir Francis Galton
  • In 1901, Scotland Yard established a Fingerprint Bureau
  • In 1903, New York Prisons adopted the use of fingerprinting
  • In 1905, the US Army began using fingerprints.
  • In 1907, the US Navy began using fingerprints.